Filtering
Mountaintop POS offers best-in-class reporting both in regards to flexibility, specificity and coverage, and powerful reporting can be achieved with good knowledge of the filtering system.
Filtering in POS works consistently throughout the modules, so, learning filtering in reporting also pays dividends when it comes to building good automatic orders and extracting useful metrics to improve performance of the business.
Additionally it is important to understand that one set of filter criteria doesn’t suit everything, and should be adapted depending on what report or operation is being run. By default we load settings which we think would suit most stores, however if you require different filtering or are looking for a different result, you are encouraged to modify these default settings as you see fit. Additionally you can save your filtering customisations for use next time.
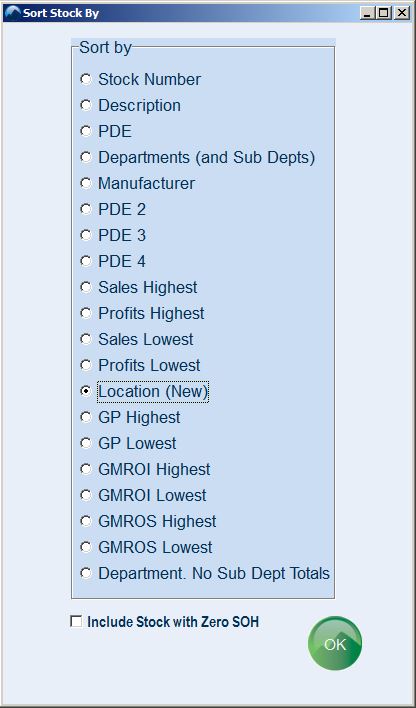
When running reports in POS, especially those looking at stock items, you will be asked to order your report. Depending on what you’re assessing with the report might inform which option you choose. For instance for analysing profits and performance you might order by Department (and Sub Depts) or by Location, or perhaps by Profits Highest, but for checking stock value rejections you might prefer results sorted alphabetically by Description instead.
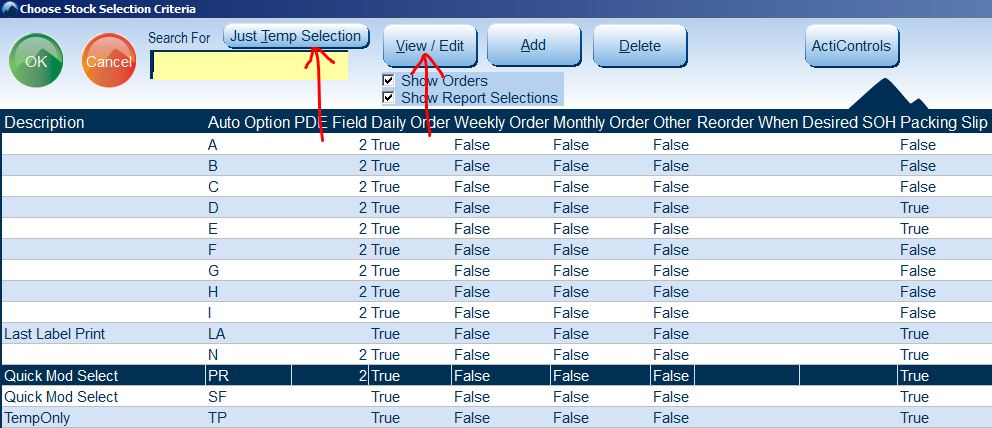
Click OK, and you will be taken to the following screen next.
There are two buttons at the top where you can set your filtering criteria. Using Just Temp Selection will let your specify filtering criteria for this session only. View/Edit will remember your preferences going forward.
In any case, the filters should be checked before running a report, especially if you have multiple staff running reports, as they may have set special criteria for themselves.
When we train new customers, we always recommend using the Just Temp Selection button as then your filters wont affect others who forget to check the filtering before running a report.
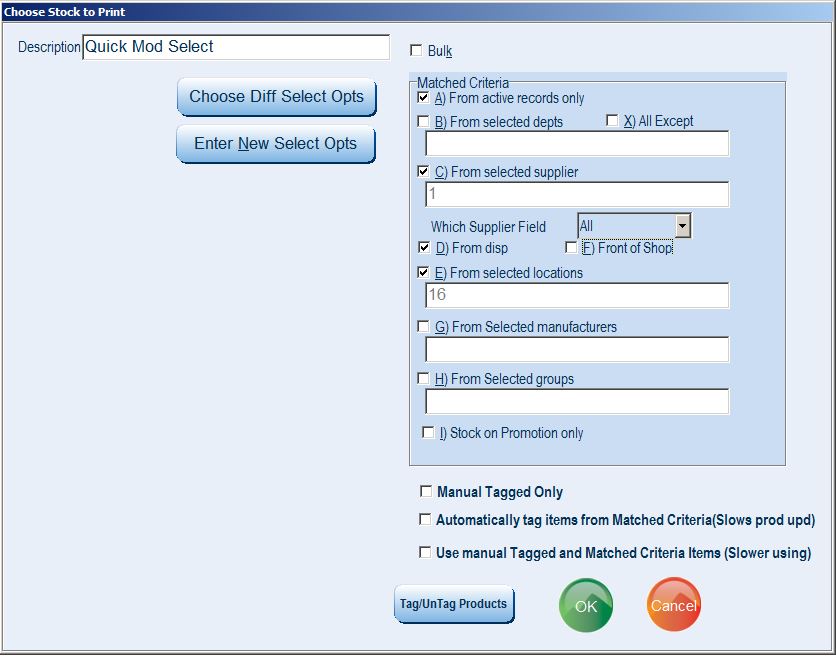
Choose a button, and the filtering window will appear. The darker blue box on the right is where we set our filtering options. There are options to manually tag individual items if you prefer, as well as some other options in the checkboxes at the bottom.
Below are a few examples where different filtering criteria have been set. When selecting departments, suppliers, locations, manufacturers or groups, in the small window that opens you should type in the items you want included one at a time and click OK to add the selected item, then click cancel when you are finished adding.

Once you have specified your criteria, click OK, to run your report. Depending on the report you are running there may be some further options to set. For example the Standard Configurable Profit report will also ask you which period of time you would like to look at, and which columns you would like included on the report.